Two Go Mad In The Garage

How two numpties try to build a Westfield kit car.

Saturday, January 27, 2007

We did some work trying to drill out the rest of the rivet holes for the interior panel on the drivers side.

Here you can see Chrissy using the dremel-alike with schnozel extension to try and drill into the lower chassis member.

This did not work very well and overheated our dremel-alike, therefore going to try waiting until we have a better drill bit. Which is on order.
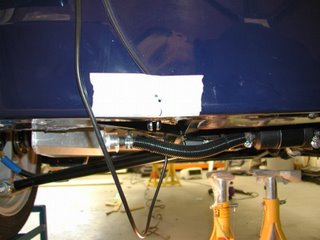


While Chrissy popped out this morning, Tim worked on the lower spare wheel bracket. It is another of those very difficult measuring jobs as everything is a curve. Here you can see the 3mm pilot hole in the back nearside of the car.


And in the next picture you can see the picture from underneath, with a pencil pushed through the bracket to see if the pilot hole is in the right place.
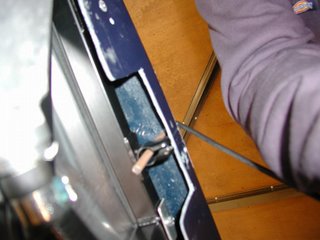
Because these holes fall on a step in the rear body, they don't look round even if they are. Still at least they will be largely hidden by the spare wheel itself.


Attaching to the lower spare wheel bracket is the numberplate, and attaching to that is the numberplate light. We drilled out all of the necessary holes for these to be fitted.
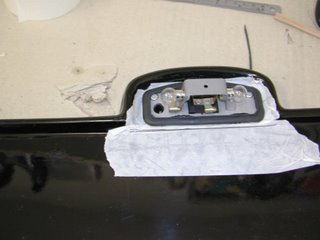


But haven't actually attached any yet, as the spare wheel is heavy and we need to see how much the bracket bends down, so may have to enlarge the holes in the body work so that the bracket is not being supported by the GRP.

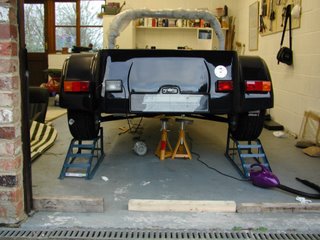
In the final photo you can see the number plate resting on the bracket, just held in place by rivets push in and friction, the rivets are still to be rivetted.


Thursday, January 25, 2007

Wing Mirrors and Interior Panels

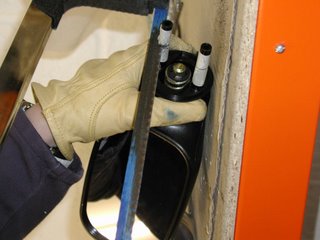
We got the wing mirrors mounted onto the windscreen pillars by dint of fettling, and then screwed them in place with some number 10 self tappers through the pre-cut holes in the pillars.

Here you can see the finished items.

This has taken us a little while on Tuesday and today (last night we had to watch Arsenal come back from 2-0 down against sp*rz).

We have also made a start on the interior panels. First thing to do is to cut out the paneling where the bolts for the lower seatbelt straps fit onto the chassis bosses. Here you can see Chrissy doing that.


We have also started drilling the rivet holes now we know that yes on the top edge just attach to the overhanging GRP of the body using small peel rivets and elsewhere use regular rivets to attach to the chassis rails. Thanks to Mark at WF for the advice.

We have also done a little work on measuring and drilling the body at the rear for the spare wheel bracket to mount.

The garage is a cold place to work these nights though.

Monday, January 22, 2007

An hour each but little progress

After making some good progress on Saturday, Tim spent Sunday afternoon at the emirates (2-1 against ManU hoorah!) and we made little progress today.

Our first job was to rivet on one of the interior side panels that hide the chassis rails. However we had several questions that stopped us before we started - (a) we needed to work out which of the two harness points to use as we would need to cut a hole for them (b) we wanted to check with WF if it's OK to put a rivet just into the GRP as the body stands clear of the chassis rail at the top.

We then had a little fight trying and failing to tap some holes which I won't bore you with - then we decided to cut down the side mirror mounting lugs as the first of the jobs to fitting the windscreen - something we are not looking forward to. the wing mirrors are obviously off some production car and the mounting lugs are too long.

Even after cutting them back the mirror won't fit nicely in the windscreen pillar - it's hard to see what is fouling, but we suspect we need to file away some of the plastic surround as it is probably just a little too big diameter to fit nicely in the circular receptable moulded into the pillar.

We'll carry on tomorrow night.

Saturday, January 20, 2007

Staurday's post - part II

Here you can see us screwing down the front top transmission panel.

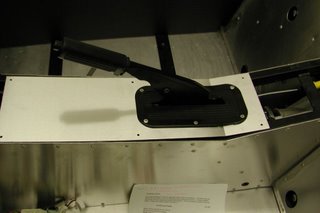
The rear part needed a rubber gaiter riveting to it, through a circular metal bezel.

This process involved several Tim bog ups, including the fact that the original hole for the gearstick Tim had managed to cut too far back and so we had to elongate. The other problem we found was that a lot of the rubber had to be cut from underneath the gaiter to give the wimpy aluminium bezel any chance of compressing it without bending as the rivets were compressed.

In the next photo you can see us pushing the final rivet through ready for the rivetting tool ....


Whilst all this was going on Chrissy was re-engineering the Ecu plate that we worked on months ago, as we realised that there were solenoids/relays from the main loom that also needed to mounted on that plate., or at least we assume they do, the manual doesn't seem to mention them at all.

When all this was complete we tacked the front panels in place, not wanting to tighten them up yet as we are bound to think of a reason why we need to take them off again in the next few hours!

Any way here is a picture of the finished arrangement - with the two sets of cables protruding from the two holes encased in large rubber grommets, and the gear stick protruding from the rivetted on gaiter. Most of these sins will be covered by carpet!

the Ecu plate can be seen on the bottom left of this final photo.

Lots done today...

We got lots done today, wth about 4 and a half hours in the garage each. We started by refiting the front speedo cable and threading that with the ecu loom through the transmission tunnel,
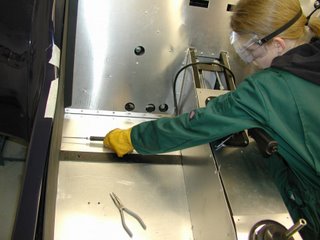
this is incredibly difficult. We both have incredibly small (girly) hands but even we find it difficult. There is almost no way to get your hands into the transmission tunnel and cable tie these cables onto the existing (main loom cables) that already run through there. You need to have these well secured (and covered with some protection) as it if the cables come free they drop into the road/rotating prop shaft - neither event likely to make your day.


Here you can see the speedo pickup attached to the front wheel, several attempts required as you need to get the head very close to the bolts on the wheel hub as it is the bolt heads passing that induces a current which registers as a pulse at the speedo.

While Chrissy was using her ultra tiny hands to do that, Tim was off on one - deviating from the manual.

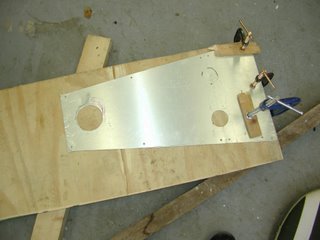
His first job was to cut a second 45mm hole in the aluminium top panel - it is hard to cut big holes in flimsy 2mm? thick aluminium as it bends and generally tries to run away rather than be cut up - to the left here you can see the method we found best - clamp to a flat old piece of wood and drill against that -

Of course Tim didn't have the required 45mm hole saw, so a trip to HomeBase was required, and they only had expensive ones (£9) then of course on returning home none of the Mandrels we have to mount them in the electric drill would fit, so a return trip was required to shell out another £10 for a suitable Mandrel. Anyway at least these cut nicely and cleanly.

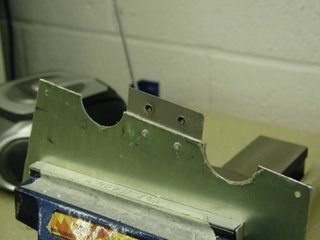
Rather than try and push hundreds of connectors through the 45mm holes (that Tim had just drilled) in the top transmission panel to get the wires to run up from the tunnel into the area behind the dashboard, he decided to redesign - and cut the front panel in half through the holes - then mount a splint of aluminium on the front sections using some rivets and then on the splint mount some rivnuts to allow the back part to bolt on. The splint has several purposes - strength, and water protection - it is likely spray will get up here, so the splint will help protect the cut line from leaking too much water -

You can see our lovely rivnut tool here -

And here you can see the now cleaved front section with the splint riveted to it and the rivnuts inserted in the front of the splint.


Oh dear blogger seems to be objecting to the number of photos so I will have to do another post to complete the story....

Wednesday, January 17, 2007

a couple of little jobs


Just a couple of little jobs over the last couple of days as Tim is still suffering from a cold - sorry to hear you are too Di. We have riveted on the handbarake surround to one of the top panels that has to cover the transmission tunnel, and we have completed the grill fixing - abandoning sikaflex and switching to araldite for the cable tie posts, Tim also put new 2pin AMP connectors on the front indicator cables that can be seen on the picture lying on the grill.

We tried out fitting the interior panels too as probably want to fix them before we put the scuttle on.

Monday, January 15, 2007

Tim in bed with a cold


...and very grumpy with it...so no work on Sunday, but Chrissy took this photo of our rivetting underneath the body.

Saturday, January 13, 2007

Nailing the body on

We spent seven hours between us nailing the body on today. We can;t show you any pictures as the battery on the digital camera went flat. So here is a brief summary of what we did ...
jacked the car up, drilled lots of holes through the body and the chassis and put 4mm body rivets through. Doesn't sound much, but lots of use of the trolley jack and axle stands, combined with lots of measuring out to check the rivets actually went into the chassis meant this was, as always, a slow process.

This is also not a job for the elderly (Tim) laying on your back your back hurts, your muscles are too weak to push up on the drill for long periods and your accomodation is not good enough to focus on the ruler held close to your eyes.

More seriously - if you are another prospective bulder serious advice is (1) buy a really good/expensive drill (18V) and (2) use bullet style drill bits, (3) wear mask and goggles (4) to help get a fix on where the chassis rails run you can drill the seat holes and measure back from them.

Next job is to bleed the brakes - haven't got a clue where to start, despite reading the wscc website! Prepare for a flood of hydraulic fluid.

Sunday, January 07, 2007

An hour a hole

Four hours in the garage in the last two days, that is four hours each, to get four holes!

These four holes were to mount the bonnet catches. Very difficult to get in the exact position, they needed packing up by 5mm on some aluminium to get to the right height, and the predrilled holes in the catches were in the wrong place (directly over a weld) so we had to reposition rivet holes.

All seemed to be well until we packed up for the day, then we put the scuttle back on and tried to relock the bonnet, although we achieved this it was certainly not smooth as the scuttle seemed to push the bonnet forward a bit - ruining our precise alignment - argh! our current thinking is that if we file the leading edge of the metal flange that mates with the semicircular troughs in the catches that may give us the 'play' that we need.

Still at least we watched Arsenal beat Liverpool in the cup on the tele last night.

Counters
Site Counter