Two Go Mad In The Garage

How two numpties try to build a Westfield kit car.

Wednesday, June 28, 2006

Bonnet test fit

Here you can see that the nearside lines up beautifully .....


wheras the offside - doesn't line up very well at all, although it only seems to be the nose cone, the bonnet sens to fit on the body ok.


The good news is that to make the body the same width as the body you need to pull it out a little this means it is no longer fouling the cooling pipe.

Tuesday, June 27, 2006

No time for much tonight

We had less than an hour to spend in the garage tonightso not much progress. We got our dremmel equivalent working and 'fettled' out the heater pipe holes in the scuttle, it is a powerful tool and we probably took slightly too much grp away. We also trial fitted bonnet and nose cone, the latter does not seem to line up very well on the offside, we'll get some pictures tomorrow night.

Monday, June 26, 2006

Solved last nights problems with the heater fitting, by drilling a couple of extra holes in the heater bracket (see picture).

Also used the heater as a template for drilling other holes (it meant drilling back to front with the pretty side of the GRP on the exit side of the hole, not recommended from a risk of cracking point of view but these holes are going to have big 'repair' washers around them so the aesthetics don't matter that much.


Also used a new 16mm hole saw (bought from that excellent real honest to god tool shop in Fulham called Grizards - a shop that is the opposite of chain DIY stores, they have everything and know what they are talking about, if I say "hand written receipts" you'll get the picture http://www.grizards.co.uk/) unfortunately the specified 16mm isn't big enough for the metal pipework so will need to 'fettle' that out tomorrow.

It doesn't yet feel like we are on the downhill stretch as we know there is months of work still to do, but we are making progress.

Sunday, June 25, 2006

Not so easy today

Spent the morning mostly clearing up/sweeping out the garage before we continued. This gave us both dreadful hayfever and we had to stop until after we had watched England struggle past Ecuador (is Sven the worst value for money manager in the world?, how many million a year and our cat could do a better job.... and it's dead).

We marked up the scuttle according to the "manual"/guide/work of fiction/book designed to make you screw things up for the heater fixing holes. Made the measurements a dozen times before drilling, but then found that using the manual measurements put the top holes too close to a protrusion on the rear of the scuttle and so the heater won't actually fit! Thinking we may drill some extra holes in the heater bracket rather than redrill the scuttle - both for aesthetic reasons (don't want two redundant holes in the scuttle even if it is on the bit under the bonnet) and for engineering reasons (two sets of close together holes on the fibre glass holding up heavy heater looks like a recipe for cracks).

Also have spotted a place on the front nearside where the body fouls one of the pipes the body, options are move pipe (leaves redundant holes and means moving a rivnut on one of the bigger pipes) or 'fettling' the body and bonnet lip back around that area - thinking at the mo. we'll take the latter option.

Still at least the garage is clean!

Saturday, June 24, 2006

It looks like a car!

In the hot weather we got our masks goggles and gloves on and drilled the body and wheel arches. We then bolted them together.

As some holes required being done in two parts we had to bolt and unbolt each side several times.

Combined with the very hot weather this meant the whole job took several hours.


Once we had the wheel arches on, we lifted the body into position, this was all ok, except the bits of the body that need to go over the rails at the back of the cockpit wouldn't go. Chrissy eventually worked out how to apply some force to make this happen.


And once the body was on the car, we put the rear wheels on, obviously this was only because it is recommended to measure up the spacing of the body on the chassis, and nothing to do with the fact that we wanted to see what it looks like.


We were exhausted after that and so went in to watch the football and have a beer.

Thanks to Anna for taking the photos.


Friday, June 23, 2006

Preparing for first body fitting

Completed a couple more tasks this evening (and spent still more money on tools) prior to hopefully first body fitting tomorrow. Fitted the speedo transducer bracket to the front offside wheel, this is a stupid position as (a) wiring exposed to elements (b) not a great place to try and get precision fit that is needed (c) when it gets to the SVA test their rolling road speedo test won't work as it assumes back wheels drive speedo.

Item shown here highlighted with arrow


Also did some final-ish bits on the cooling system.


Order of work now is something like that shown below, tempted to try and start engine before final body riveting but umming and erring about pros and cons of that.


Before (First) Body Fitting….

Torque up lower steering column again


Fit rear wheel arches to body shell


When the body is on first time….

Work out positioning and tack in place with two rivets up and G clamps

Drill 12.5mm hole through metal tabs for roll bar

Work out boot box positioning and work out what to drill on that

Cut out 51mm holes from the body fibre glass around where the roll bar goes

Test fit roll bar

Check light fittings location are within SVA spec and mark them

Mark up exhaust outlet location from template

Mark up Fuel filler location, taking care not to impede where lights go

Check coolant pipe locations on the body

Check front brake pipe locations on the body

Check the final wiring routes with the scuttle resting in place


When the body is off again

Drill at least the pilot hole for the fuel filler (probably best to complete on the car, but pilot hole best drilled when body is off to help avoid drilling in wrong place)

Cut out hole for exhaust

Fit lights

Paint rubber undercoat in arches?

Tidy up all of the wiring we can without scuttle in place

Check everything is torqued up that needs to be

Complete last two P-clips for coolant system location

Check all the wiring we can


Other to do stuff that doesn’t have to be done before body fitting


Radiator Overflow Pipe - what to seal it up with?

Cut accelerator cable unused length (what is the best way?)

Mark up Scuttle for heater pipes (are they too high?)Drill Scuttle for heater pipes

Stick on the demister distibutor thing (buy glue?, find it?)

Work out run of washer bottle pipe…see other document


Thursday, June 22, 2006

steering works


Well it took us an hour to get the lower steering rack on the splines at each end, and we just pray we won't need to take it off *ever* again as I don't know how we will. But we bashed, wiggled and pushed until it was on. Then just to celebrate we put the two front wheels and the steering wheel on so we could sit in the car and pretend to drive it.

We know it's childish but it seems so great that turning the steering wheen turns the front wheels!!

Wednesday, June 21, 2006

Tiny Steps forward

OK, think we (well Tim) has worked out the wiring of the speed trasnducer, there is no loom connection as such the wire that it comes with just goes all the way back through the scuttle on to the speedo (doh!).

Also have successfully converted the lambda sensor connector block to the little AMP connector that fits the loom. We have not found any crimping mechanism that is satisfactory, though that is obviously what the connectors are meant for, but if, like us, you solder, then you need to be very careful not to fill in the little well just before the blade of the connector as this locates the plastic lock device inside the connector body, and if it's full of solder you this mechanism won't work.

Spent a fruitless half an hour searching and re-searching the remaining bits for the lower steering column support bracket, only to find that ours does not have one, as a single piece unlike that shown in the manual I guess it doesn't need one.

That said have failed to get the lower steering column to fit on the splines at each end despite loosening the steering rack.

Monday, June 19, 2006

Rear Brake Hoses Fitted

Nothing's ever as easy as it looks...mainly because the manual sucks. Fitting the rear brake hoses should be an easy job involving a couple of washers and doing up a couple of nuts tight enough, but not too tight.

In fact with the golf calipers supplied the manual tells you to move the bleed nipple (err no that only applies to the Sierra calipers you used to use WF), neglects to mention that you need a couple of convertor widgets,


Result being a five minute job becomes a 45 minute one, involving research on the Internet. Thanks to Nikpro for having such good pictures on his site.

Struggling with many other things too, particularly the Smiths speedo transducer, Mark at WF has sent me some photos of how to fit on to the front of car but (a) don't seem to have been supplied the bracket (b) the wiring loom doesn't seem to be right for the connections....another email to WF tomorrow...


Here is what came with the instruments for the speedo transducer...

Sunday, June 18, 2006

Exhaust and Vents

Saturday was spent in boiler suits, gloves, masks and googles despite the fact that it was 36 degrees outside. This was in an attempt to cut out the three demister vents on the scuttle. There was steady improvement in the method of cutting. First we tried to keep clamp some wood to keep the three (taped together) hacksaw blades going in a straight line. Unfortunately this didn't work very well cause the wood was clamped higher then where we were cutting and it was difficult to clamp it in an entirely straight line. Then in our second and third attempt we used masking tape to as an edge to follow. This in the end didn't work to badly.

We also decided to fit part of the exhast so we cold make a template for the body. Our car is now kitted out in some cardboard, masking taped onto the chasis. This is currently going to reside there until we mark out the body as to where we need to cut it out.

We used a hole saw top cut out a section at the bottom of the scuttle so it will not foul the upper steering column, seemed to go ok.

We also filled the hydraulic clutch reservoir and had a go at bleeding it, don't know if this worked or not! But anyway it's full of fluid, the bleed nipple is conveniently situated underneath the gearbox.

Apologies to Martin for not adding to the blog recently, and thanks to him for his nice comments.

Friday, June 16, 2006

A/S Levels finished, back is better!


It seems like weeks since we have done any work, and in fact there has probably only been a total of about 15 man woman hours in the last 2 and a half months.

Tim did his back in and working on the car was not really an option, Chrissy had A/S level exams which are now over, so we are back...

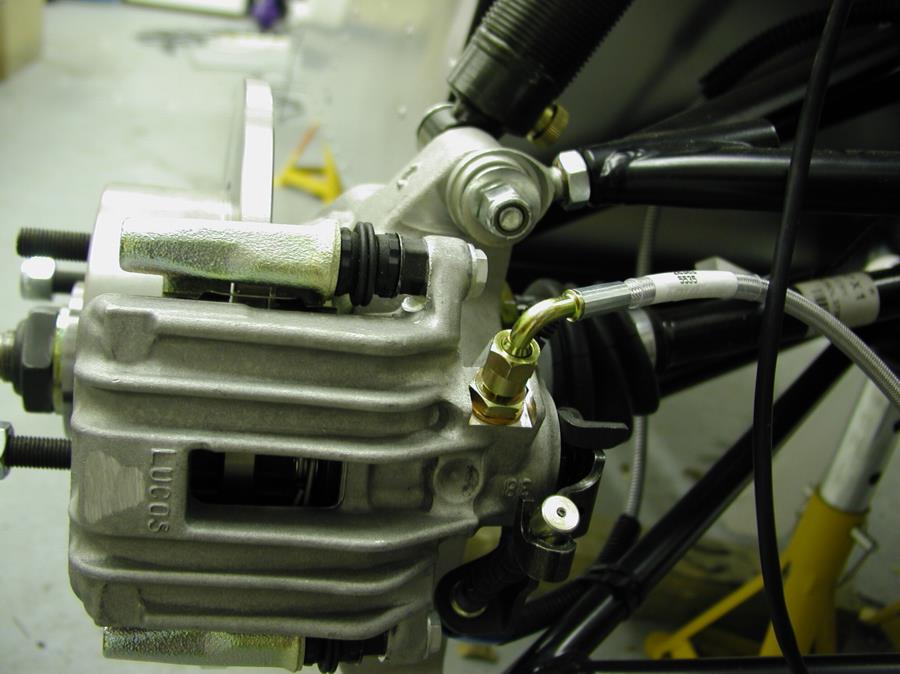
Over the intervening period we have done various bits and bobs including fitting the radiator for the fifth time having solved the problem of the radiator overflow...a different tap worked.

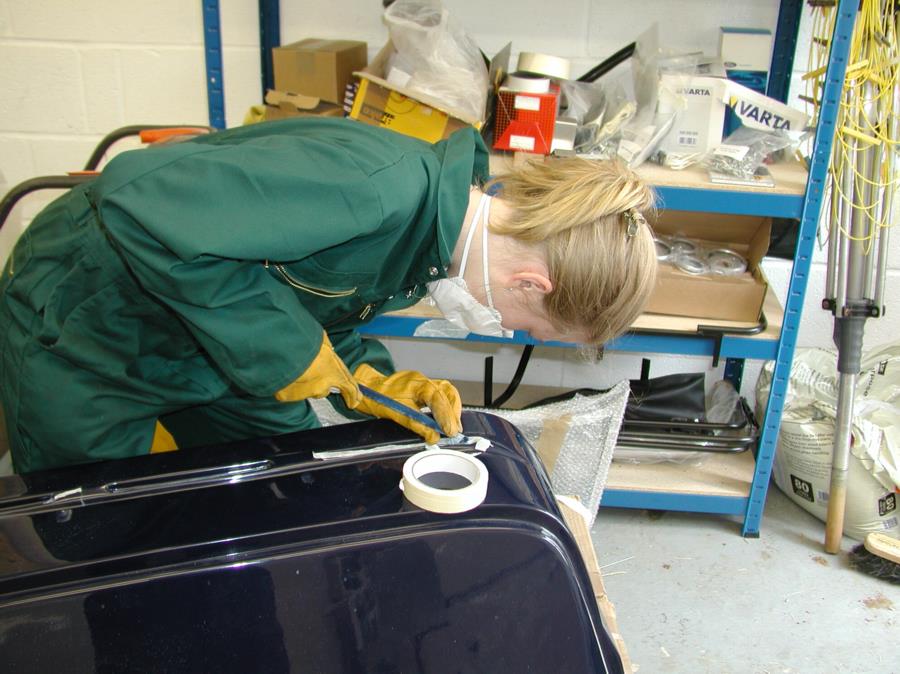
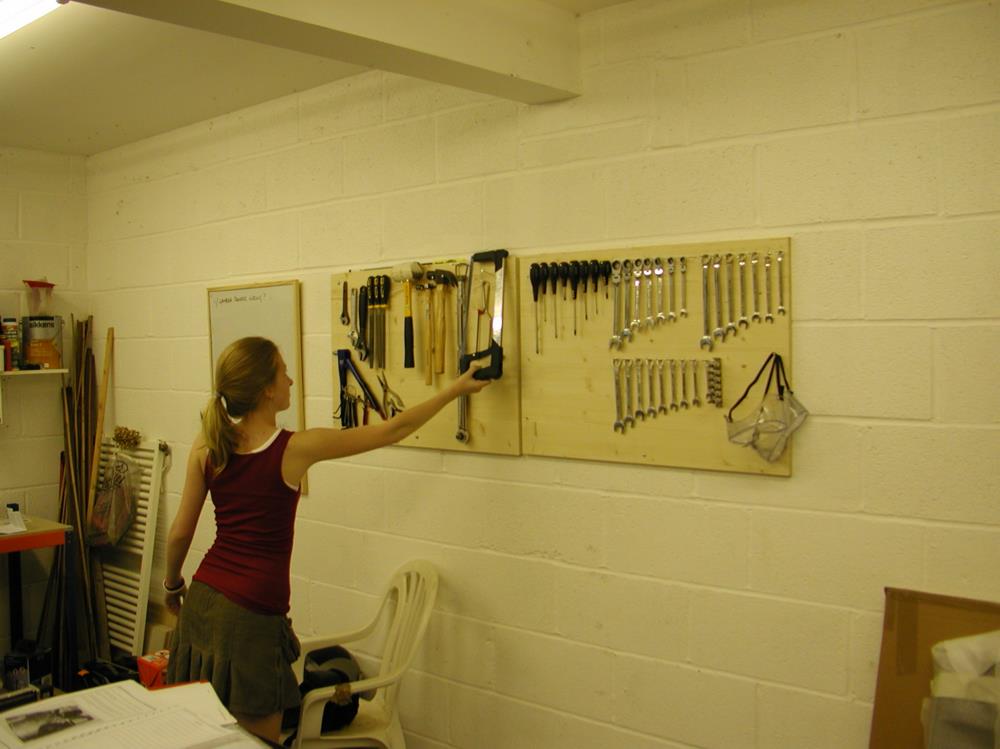
Here you can see Chrissy refitting it.


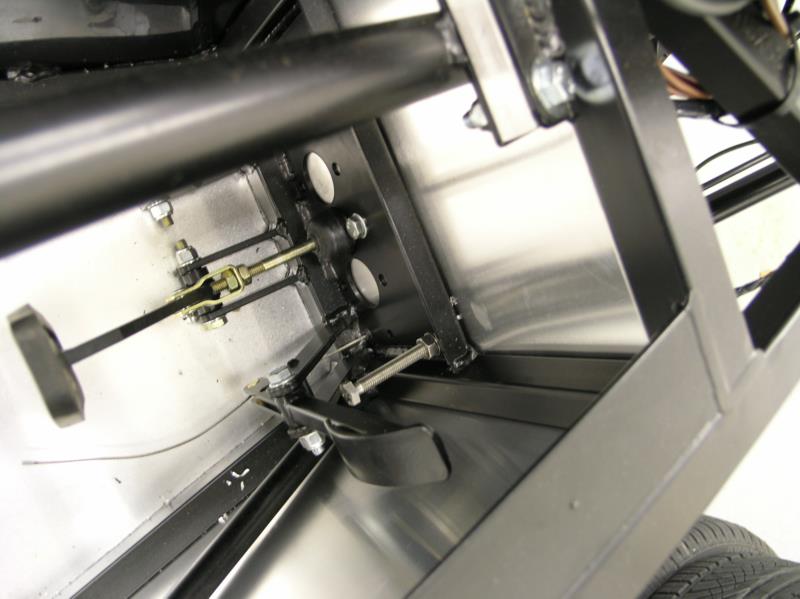
We have also finally fitted the throttle stop bolt. I found it needed to be 75mm in length, and that

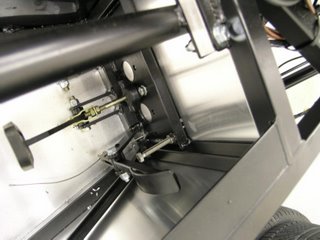
the 65mm one sent by Westfield would never work. I bought some 100mm ones from ebay and cut them down to get the right size, it's really hard to measure accurately in there so I just did a couple until I got the right size....


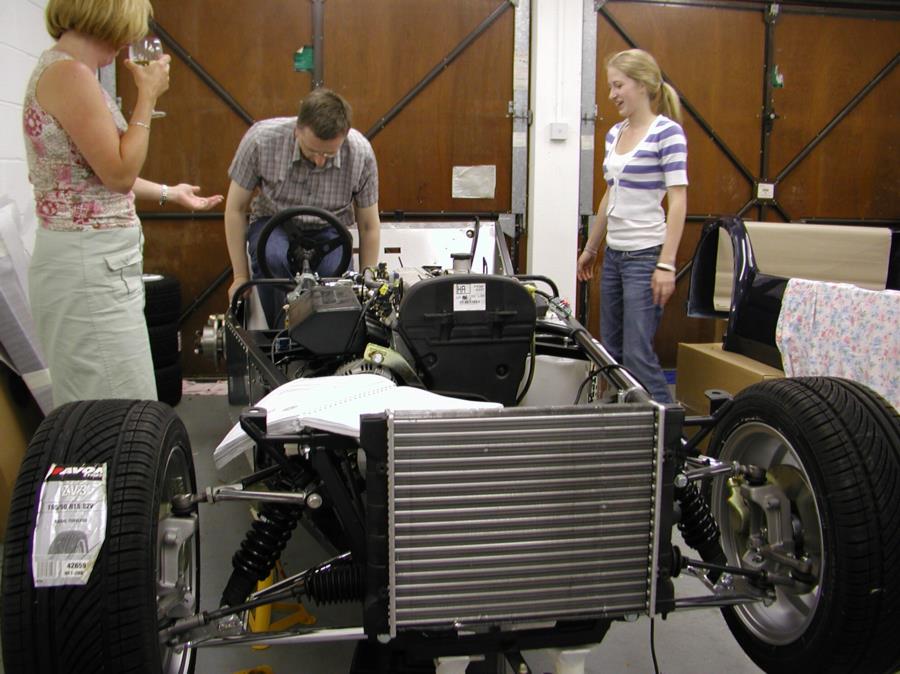
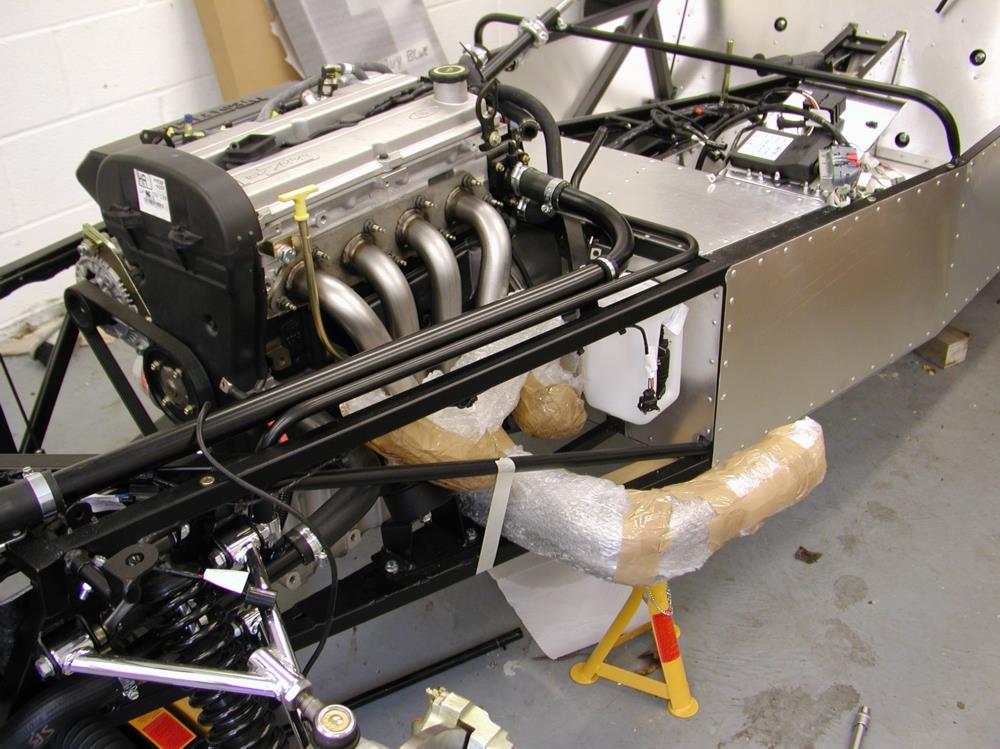
We have also mounted the ecu, relays and the monitor cable on to the ecu plate and fitted that to 
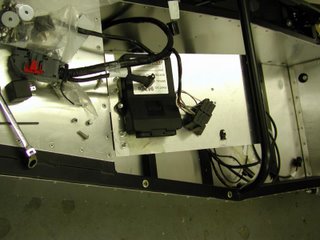
the car...you can see that work in progress on the photo below.


Then Tim got fed up with never finding any of the growing collection of tools in the garage, so while Chrissy was taking her exams (given we have an agreement that we are building the car together) Tim felt old age coming on and was compelled to put up some wall boards for mounting many of the tools on.....how sad is that!
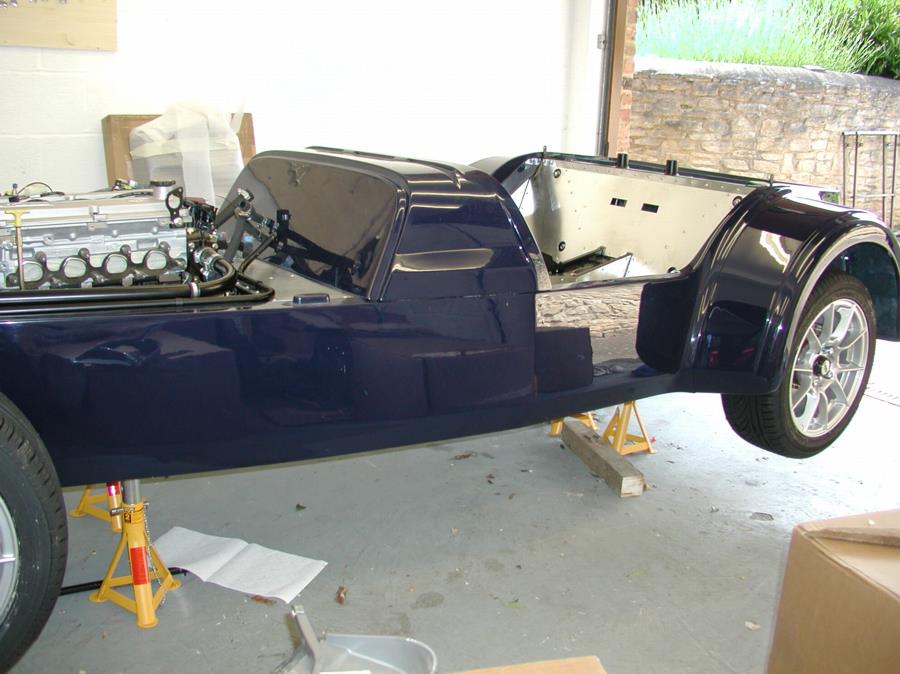
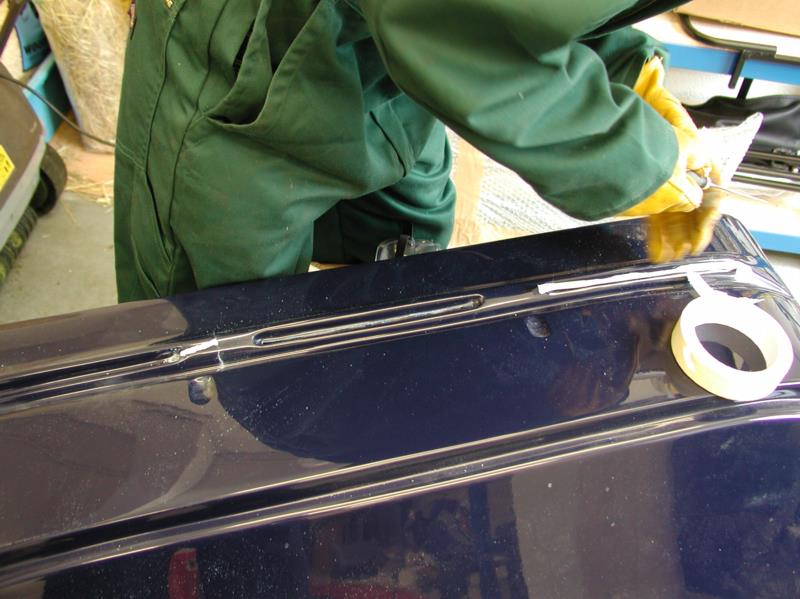
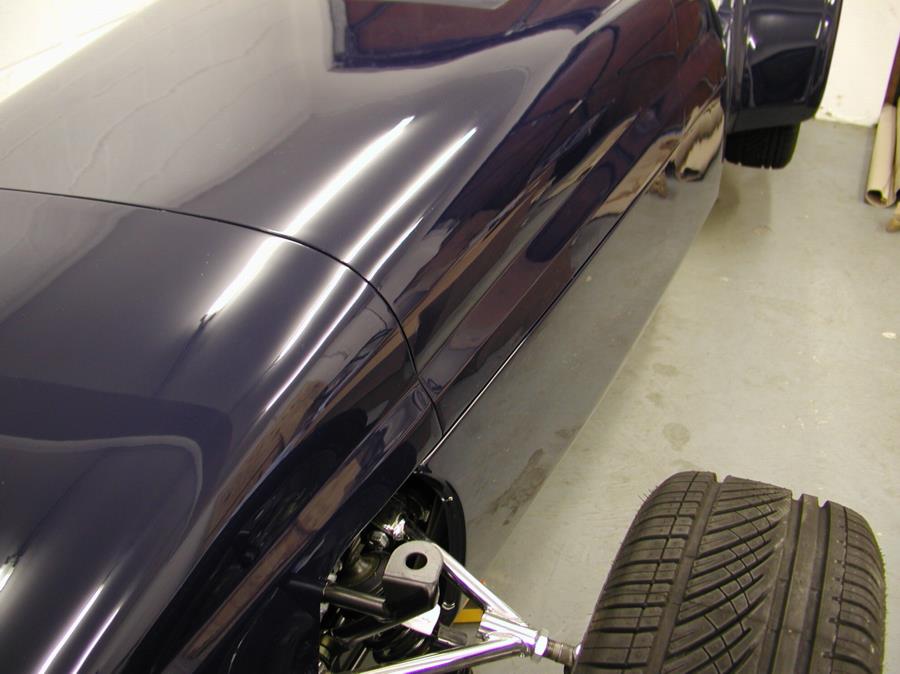


Counters
Site Counter