Lots done today...
We got lots done today, wth about 4 and a half hours in the garage each. We started by refiting the front speedo cable and threading that with the ecu loom through the transmission tunnel,
this is incredibly difficult. We both have incredibly small (girly) hands but even we find it difficult. There is almost no way to get your hands into the transmission tunnel and cable tie these cables onto the existing (main loom cables) that already run through there. You need to have these well secured (and covered with some protection) as it if the cables come free they drop into the road/rotating prop shaft - neither event likely to make your day.

Here you can see the speedo pickup attached to the front wheel, several attempts required as you need to get the head very close to the bolts on the wheel hub as it is the bolt heads passing that induces a current which registers as a pulse at the speedo.
While Chrissy was using her ultra tiny hands to do that, Tim was off on one - deviating from the manual.
His first job was to cut a second 45mm hole in the aluminium top panel - it is hard to cut big holes in
 flimsy 2mm? thick aluminium as it bends and generally tries to run away rather than be cut up - to the left here you can see the method we found best - clamp to a flat old piece of wood and drill against that -
Of course Tim didn't have the required 45mm hole saw, so a trip to HomeBase was required, and they only had expensive ones (£9) then of course on returning home none of the Mandrels we have to mount them in the electric drill would fit, so a return trip was required to shell out another £10 for a suitable Mandrel. Anyway at least these cut nicely and cleanly.
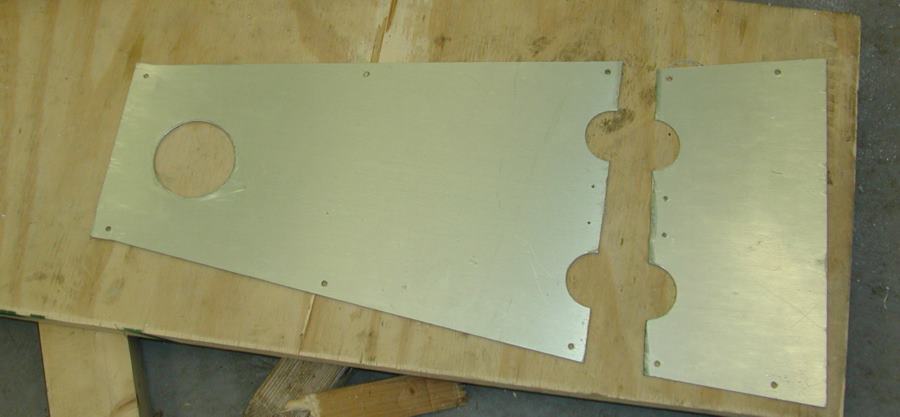 Rather than try and push hundreds of connectors through the 45mm holes (that Tim had just drilled) in the top transmission panel to get the wires to run up from the tunnel into the area behind the dashboard, he decided to redesign - and cut the front panel in half through the holes - then mount a splint of aluminium on the front sections using some rivets and then on the splint mount some rivnuts to allow the back part to bolt
 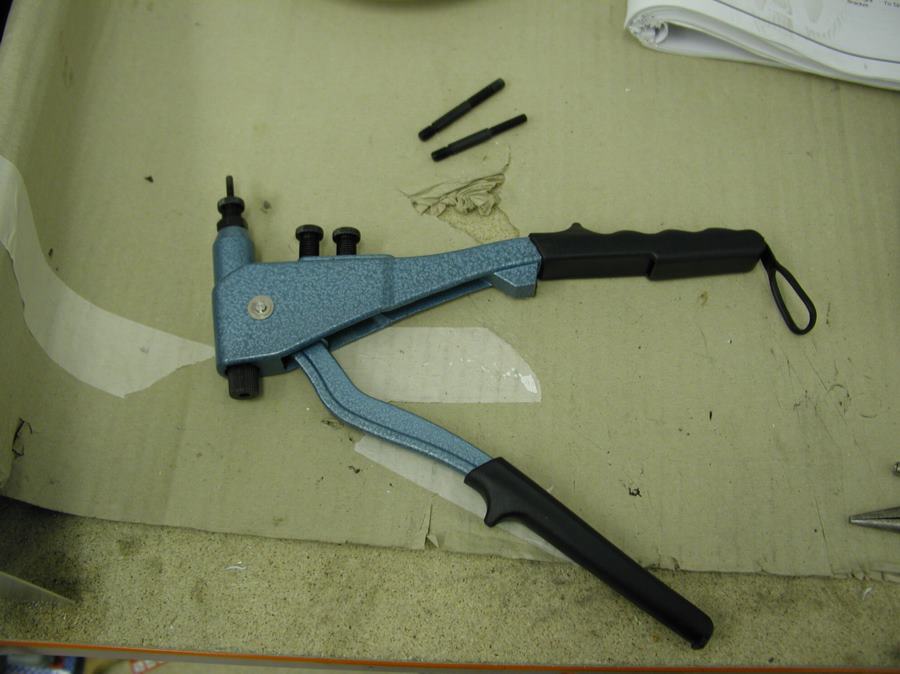 on. The splint has several purposes - strength, and water protection - it is likely spray will get up here, so the splint will help protect the cut line from leaking too much water -
You can see our lovely rivnut tool here -
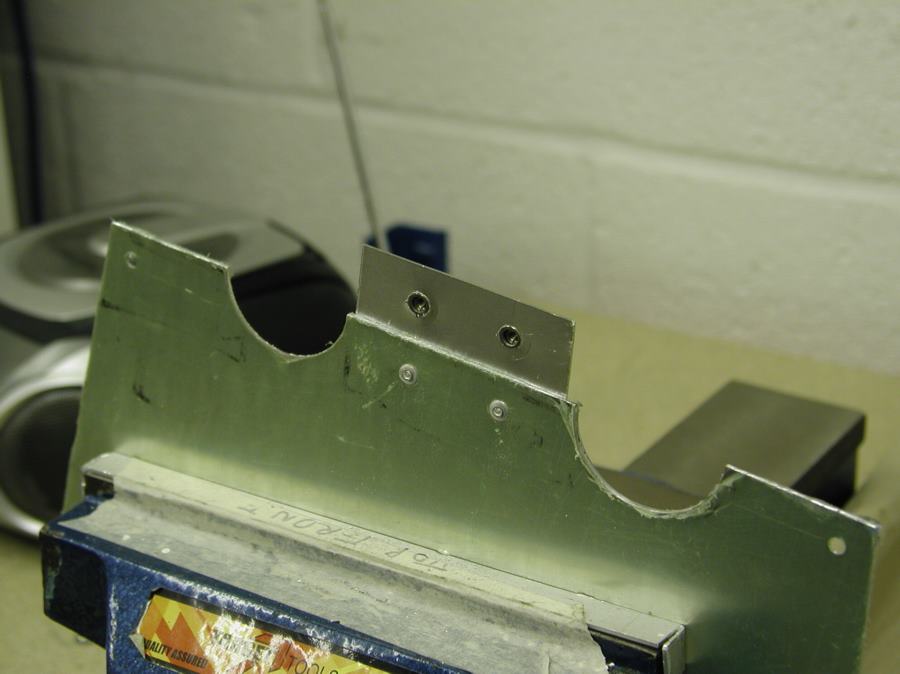
And here you can see the now cleaved front section with the splint riveted to it and the rivnuts inserted in the front of the splint.
Oh dear blogger seems to be objecting to the number of photos so I will have to do another
 post to complete the story....
posted by Tim and Chris @ 8:40 pm
![]()

0 Comments:
Post a Comment
<< Home