Two Go Mad In The Garage

How two numpties try to build a Westfield kit car.

Tuesday, October 31, 2006

Dashboard holes


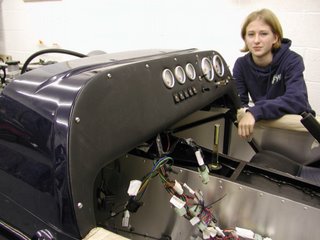
It took us an hour to drill out another six holes through the dashboard to fit it properly (although Tim would still like to fabricate attachments on the inside of the scuttle to allow the bolts to be inserted without having to fiddle around holding the nuts and washers at the same time).


We didn't get them perfectly aligned as you can see but they are reasonably hidden under the creash pad that you can see here just being held in place.

Monday, October 30, 2006

More hacking


No work for the last ten days as Chrissy has been away.

Yesterday we fitted a new fog light switch which indeed cured the fault that the telltale light was not working (nothing to do with our wiring on this occaision).

Today we (Chrissy) Chrissy unplugged all of the dashboard connections prior to us drilling all of the remaining fixing holes in the scuttle.

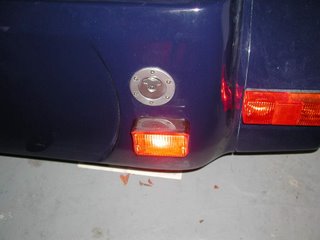
We also (Tim) hacked out the GRP for where the side indicator repeator units will be fitted to the body - this took some time and when complete, the repeater units did not seem to fit nor look anywhere close, another email to the factory required ....ho-hum.

Sunday, October 15, 2006

After the flood

Limited progress this weekend, mostly because the torrential rain in the week had flooded some of the garage for a few hours and so some cleaning out was necessary.

Anyway we did finally get the bushes, which hold the eye bolts, which hold the seat belts, tapped out. (Bob suggested using a bolt with part of the thread cut off as an improvised tap, but since messing these bushes up would be about as bad a mistake as you could make - them being welded into the chassis and all - we decided to get the proper tool). The proper tool was not the aforementioned M10 finepitch tap but in fact a 7/16 20tpi tap, something I wish I'd known earlier as it would have saved yet another unnecessary tap and die set weighing down the postman. We had to have one more hack of the boot box to get the eyebolts all the way home which we now have.

We left the boot box then for a while to look at the rest of the lights, we checked out the connection for the indicator repeaters that have to be mounted half way along the body and tested one. After that we also changed the bullet connectors on the supplied front indicators for the feeble AMP things that are required to match up to the loom.

The repeaters need holes cutting in the side of the body, to a rather odd shape, so we made some templates by scanning the manual and then doing some manipulation on the PC until they printed out the right size.

We'll probably start on that this week.

Monday, October 09, 2006

We have a fog light


Following the helpful and complete debugging instructions from Mick (holding the fort while Mark is on holiday at Westfield) we now have a fog light hoorah.

We have also sorted a couple of other little problems.

Fog light wiring explained here (Mick's words)

The fog light circuit is as follows. The fuse is supplied by a blue wire, which is from the main light switch. This becomes live only when the headlights are switched on ( second position ) Then off the other side of the fuse the wire is Blue/Red. This is the output to the fog light switch. The other wire on the fog light switch, also Blue/Red, is then the wire which runs to the back of the car and ultimately to the light. In summary, Blue wire at fuse box should be live when main lights on, then the Blue/Red wire out from box should become live at the same time. At the fog switch, one of the Blue/Red wires should now be live, and as the switch is turned on the second Blue/Red wire should be live. From here the next check would be on the Blue/Red wire in the o/s rear light plug. If there is no power at this fuse then the most probable cause would be the connection on the bottom of the fuse.

Sunday, October 08, 2006

Boot box hacking complete


Just a couple of hours in the garage this weekend.

We did however finish fettling out the four holes in the boot box that allow the eye bolts and their spacers to fit through for the harness.

This job seems to have taken forever.

We also did a few other little jobs, and ordered yet another tool a tap and die set that contains an M10 fine pitch (1.25) tap which seems to be what is needed to clean out the threads in the bushes that the eyebolts go into.

Immediate things to do list as follows -

2. Fix Fog Light
3. Fix fog light switch
5. Cable up the speedo
6. Scuttle wiring loom feed hole
7. Make the six remaining dashboard holes
8. Fabricate nine dashboard retaining sockets and glue on
12. check if we have front springs mounted properly
16. Drill out acess holes for rivnuts on chassis
17. Nail the body on
18. check hand brake cable routing / tighten handbrake
19. check windscreen washer pipe routing and cut hole in scuttle for it
28. Fix boot box on
32. find something to duct the breather hole at rear of engine
33. adjust throttle idle (how?)
35. fix leak at rear of engine
37. Change bolt on exhaust bracket for longer one
38. Check if there should be a grommet around the exahaust bracket bolt spacer collar
40. Reversing light wire connection?
42. Tighten front exhaust clip/check it's the right one
43. Get 10 x 1.25 tap for seat belt fixings
44 Get 10 x 1.0 8.8 65 or 70mm for exhaust
Tuesday, October 03, 2006

Measuring 1000 Times Sometimes Works

After are hours of painstaking measuring yesterday we discovered after more drilling that our holes were good enough! We are planning on extending these holes tmrw because were extremly lazy and only managed to roll off the sofa for 20 minutes.

Monday, October 02, 2006

And now we know how many holes it takes to fill the Albert Hall


just a little time in the garage tonight making some more holes in the bootbox. In order to allow the great big eyebolts and the spacers which hold the safety harnesses in place to pass through the bootbox.

Hard to make though as they have to line up with the bushes in welded onto the frame. Therefore lots of measuring (and a bit of guessing and hoping).

Whilst we were doing this we developed the General Unified Theory of building kit-cars which goes as follows -

1. The manual is wrong
2. If you fit it, you'll inevitably have to take off again
3. and again
4. Whatever the job is it will take ten times longer than you think before you start
5. You really really really need another tool (despite the fact that 'er indoors will swear on a stack of bibles that you have every tool ever made)

Sunday, October 01, 2006

Hacking Away

Various bits of progress and set backs over the weekend, we turned the holes cut for the roll-bar in the boot box into slots, with the intention of allowing the boot box to slide in and out without having to take the roll-bar off. ...but as you can see with the standard roll-bar (as opposed to the RAC one) this little wheeze didn't work so well -

So after scratching our heads a little we were faced with three options - go back to plan A and have to remove roll bar every time boot box has to come out (it's only two bolts but they are fearsomely difficult to get at and have to be torque tightened) plan B make the slots longer (not nice because the rear of the slots were a circle cut out and maintaining the shape while taking 10mm off is not easy) or Plan C hack off about 1cm from the rear lip of the bodywork that holds the boot box up.

No options very nice but we wen't for plan C which seemed to work ok.

We also found the mystery leak at the rear of the engine compartment - it is from a bung in the water system - needless to say it's hard to get at - that is leaking and dripping on the top of the gearbox and then running in various directions. Think we may have to wait until water system emptied before we can fix.

Failed to fix fog light despite an hour or two of trying to debug it. I wish we had a proper wiring diagram.

Counters
Site Counter